
Welcome to Tea or Coffee. Explore our practical guides designed for better focus and steady energy throughout your day.
How to Use an Espresso Machine: A Beginner’s Step-by-Step Guide
This guide shows you how to use an espresso machine at home, from grinding and dosing to pulling a shot, steaming milk and cleaning up. It covers the general workflow for semi-automatic machines with a portafilter, so check your own manual for button names, warm-up time and model-specific steps. Expect your first few shots to be practice: small, one-at-a-time adjustments are how you find a cup you like.
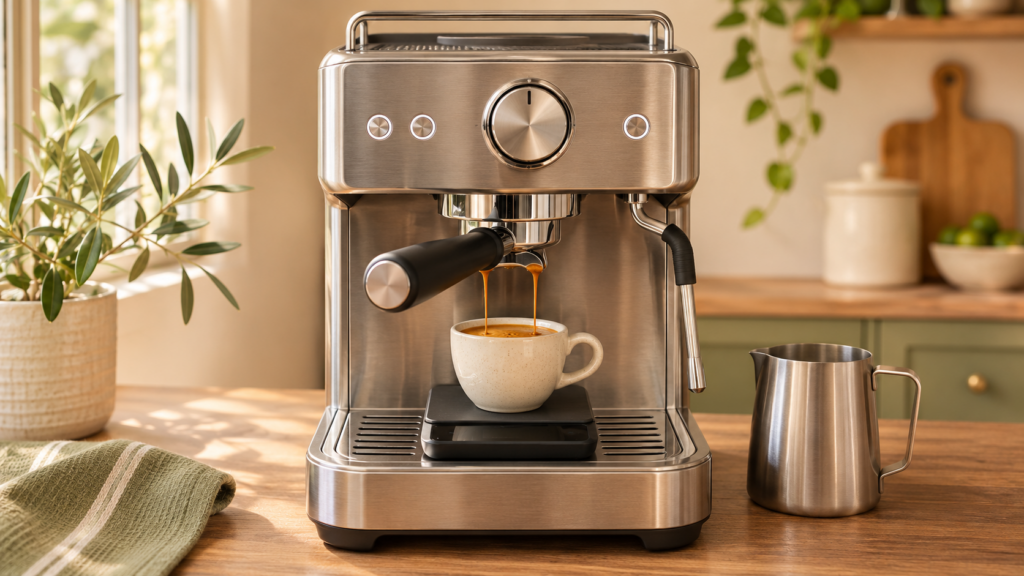
Table of Contents
Quick Method Box
You’ll need: your espresso machine, portafilter and basket, freshly ground coffee (or pre-ground with a basket designed for it), a tamper, a small digital scale, a cup and a timer.
Before you start: fill the water tank and let the machine heat up fully as its manual describes. Use the basket that matches your dose, and don’t fill it beyond its rated capacity.
Starting recipe: Counter Culture Coffee’s espresso guide uses 18 g of ground coffee to make 36 g of espresso in the cup, in about 25 to 35 seconds. Treat this as a starting point, not a rule for every basket or roast.
Workflow:
- Grind and dose the coffee into a clean, dry basket.
- Level and tamp it evenly.
- Lock in the portafilter, place your cup on the scale and start the shot and timer together.
- Stop at your target weight, then taste.
- Steam milk if you want it.
Clean up straight away: knock out the grounds once brewing has stopped and your manual says it is safe to remove the portafilter, rinse the basket and portafilter, and wipe and purge the steam wand if you used it.
If you’re still choosing equipment, our guide to the best espresso machine for home compares beginner-friendly options.
How to Use an Espresso Machine Step by Step
Step 1: Dose and grind
Make sure the machine is fully heated before you start. Then take the portafilter out, check that the basket is clean and dry, put it on your scale and tare the scale to zero.
Grind your coffee into the basket and weigh it. Each basket is made for a range of doses; for example, the Breville Bambino Plus manual rates its double basket for 16 to 19 g. Check what your own basket is designed to hold.
Espresso needs a fine, even grind, so a grinder made for espresso makes a big difference. A grinder that works well for filter coffee may not grind fine or evenly enough. Our espresso grinder guide compares dedicated options.
Pressurized or non-pressurized basket? Many machines come with two types. A pressurized (dual-wall) basket is more forgiving and is intended for pre-ground coffee, while a non-pressurized (single-wall) basket is meant for freshly ground beans and gives you more control. The Bambino Plus manual makes this same distinction.
Tip: tap the portafilter gently or level the grounds with a finger so the bed is even before you tamp.
Step 2: Tamp evenly
Rest the portafilter on a flat, stable surface and press the tamper straight down until the coffee feels firm and the surface is flat. The goal is a level, consistent bed of coffee so water flows through it evenly.
There’s no single correct pressure. What matters most is tamping the same way each time, so that when you change something else, such as grind size, you can see the effect.
Tip: check that the tamped surface is level by looking at it from the side; a tilted bed can make water rush through one side.
Step 3: Lock in and pull the shot
Wipe any loose grounds off the rim of the basket, then lock the portafilter firmly into the group head. Place your cup on the scale under the spouts and zero the scale.
Start the shot and your timer at the same moment. Barista Hustle times shots from when the pump starts to when it stops, and that’s the convention used in the example recipe here. Your machine’s controls take priority, so follow its manual for starting and stopping a shot.
Stop the shot when the cup reaches your target weight, such as 36 g in the starting recipe. Leave the portafilter locked in until brewing has completely stopped; don’t remove it mid-brew.
Watch the flow and the crema as clues, but taste is what counts. A shot can look good and still taste unbalanced, or look a little uneven and still taste fine.
Tip: weigh the espresso rather than judging by volume. Crema makes volume unreliable, so 36 g of espresso won’t necessarily line up with 36 ml on the cup.
What the ratio means: the 18 g to 36 g recipe is a ratio of 1:2: one part dry coffee to two parts liquid espresso in your cup. It doesn’t refer to the water in the tank. Counter Culture suggests ratios from about 1:1.5 to 1:2.5, so you can make shorter or longer shots to suit your taste.
Step 4: Steam milk, if you want it
If you’re making a latte or cappuccino, steam the milk after pulling the shot. On a machine with a manual steam wand, the general sequence is:
- Select steam mode and wait until your machine is ready, then briefly purge the wand over the drip tray as its manual directs.
- Fill the jug with cold milk to the level recommended for your machine and jug, leaving room for the milk to expand.
- Put the wand tip just under the surface and turn the steam on. Let it draw in a little air to build foam.
- Lower the tip slightly so the milk starts to spin and heat up.
- Turn the steam off before you remove the wand from the milk, then wipe and purge the wand.
Follow your manual for the target temperature. The Bambino Plus manual, for example, gives 60 to 65°C for manual steaming. Machines with automatic milk texturing have their own settings, so use those instead.
If your machine has no steam wand, you can still froth milk in a French press. The milk you choose affects how it foams, which we’ll cover in a guide to the best milk for lattes.
Tip: wipe the wand straight after steaming, before milk dries on it.
Step 5: Rinse and clean after use
Once the machine has finished brewing and your manual says it’s safe, remove the portafilter and knock out the used coffee. Rinse the basket and portafilter, and run a little water through the group head if your manual suggests it.
After steaming milk, wipe the wand and purge it. Some machines, like the Bambino Plus, purge the wand automatically when you lower it; others need you to do it by hand.
Backflushing and descaling an espresso machine depend on your model. Some machines aren’t designed for backflushing, and descaling methods and intervals vary, so do both only as your manual describes.
Tip: empty the drip tray regularly so it doesn’t overflow.
Troubleshooting: Sour, Bitter or Uneven Shots
Taste is your main guide, but flavor problems often have more than one cause. Barista Hustle’s Espresso Compass explains that the amount you extract and how evenly you extract it both affect taste. Use the clues below as starting points, keep your dose the same and change one thing at a time.
Sour and running fast. If the shot tastes sharp or sour and finishes well ahead of your target time, try grinding a little finer. The roast also matters, since lighter roasts can taste brighter even when well extracted.
Bitter and running slow. If the shot tastes harsh or bitter and runs much slower than expected, try grinding a little coarser. Grinding finer doesn’t keep improving extraction indefinitely, so very fine grinds can make things worse.
Both sour and bitter, or uneven flow. A shot that tastes sour and bitter at once, or that flows faster from one side, may be extracting unevenly. Check that the grounds are evenly distributed, the tamp is level and the basket isn’t overfilled.
Little or no flow. If almost nothing comes out, the grind may be far too fine or the basket overfilled. Stop, check the dose against the basket’s rating, grind coarser and check your manual for other causes.
Choosing an Espresso Machine
If you’ve worked through grind, dose and tamping and still struggle, the limitation may be your equipment rather than your recipe. A machine that can’t hold a steady temperature, a grinder that can’t grind fine enough or a basket that doesn’t suit your coffee can make consistent shots hard.
That’s the point where it’s worth comparing machines and grinders. Look for one that suits how you like to work, whether that’s an all-in-one with a built-in grinder or a separate machine and grinder.
FAQ
Can I use pre-ground coffee?
Yes, but it works best with a pressurized (dual-wall) basket, which is more forgiving of a grind that isn’t tailored to your machine. For more control over the shot, freshly ground coffee in a non-pressurized basket is the better choice.
How much coffee goes in the basket?
It depends on the basket. Each one is designed for a dose range, such as the 16 to 19 g the Bambino Plus manual gives for its double basket. Start within your basket’s range and keep the dose steady while you adjust grind.
Do I need to steam milk?
No. Espresso on its own is a complete drink. Steam milk only if you want a latte, cappuccino or flat white.
Why does shot timing vary?
Grind, dose, tamp and the coffee itself all affect how fast water flows. Different machines and guides also time shots differently, for example from pump start or from the first drops. Use time as a clue alongside taste, and don’t change a shot you enjoy just to hit a number.
Conclusion
Start with the quick recipe, keep your dose steady and adjust one thing at a time until you find a shot you enjoy. Once your routine feels comfortable, explore other brewing methods in our home brewing guide.
